Probably,
this is one of the simplest concepts for most of the SQL
developers. If you are very frequent in performing the DML statements, then you
would have seen the “rows affected” message in the result tab. In most cases, the rows
affected message help us in rectifying the actual rows that are either inserted
or updated. But, just hope that the stored procedure written by you doesn’t
require a count of the rows being affected. In such cases, we can use a command
as SET NOCOUNT to just hide them. Doing so can as well increase the performance
of the query. To be very straight, most of my initial Stored Procedures were
without the SET NOCOUNT command.
General
syntax of using NOCOUNT for hiding messages:
SET NOCOUNT ON
General
syntax of using NOCOUNT for showing messages:
SET NOCOUNT OFF
Let’s try with an example of rows affected message in the results tab.
I have
created a table as SQLArena_Test and imported the data from the SQLArena_Test table
to a test temp table. Here, we are seeing the rows affected message as I have not mentioned the SET NOCOUNT statement.
Without SET NOCOUNT ON:
insert into ##Test
select * from SQLArena_Test

Here, the SET NOCOUNT ON is not added, so the number
of rows affected message will be displayed while importing the data.
With SET NOCOUNT ON:
SET NOCOUNT ON
insert into ##Test
select * from SQLArena_Test
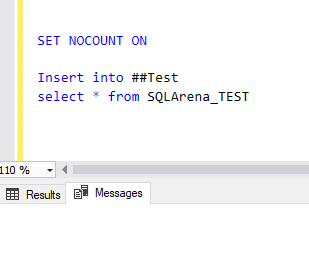
Here, the SET NOCOUNT ON is added, so the number of rows affected message will not be displayed while importing the data.


